Cladco Composite Wall Cladding
Installation Guide, Aftercare and FAQS

Storage, Handling, Colour and Health & Safety


Storage and Handling
Cladco Composite Wall Cladding Boards should always be stored in a cool shaded spot, on a flat and level surface which supports the whole length of the Boards. It is recommended to store the Boards on a pallet to ensure they are not sat directly on wet or cold ground.
Wear protective gloves when handling the Boards and take care when lifting them. We recommend that a minimum of two physically capable persons carry the Boards.


COLOUR
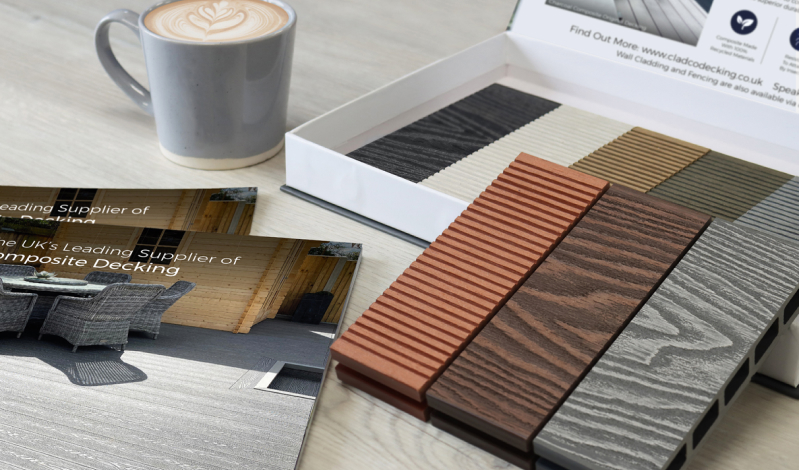
Cladco Composite Wall Cladding Boards are designed and manufactured to replicate the natural variants of a timber cladding board.
It’s recommended to purchase all Boards required for the project at the same time, as this will ensure colour consistency and only one delivery cost. We recommend laying out all the Boards before installation to ensure a natural effect of grain and colour tone is balanced across the whole of your Cladding. As with all materials exposed to direct sunlight, some natural weathering will occur over time.


HEALTH & SAFETY
Cladco Composite Wall Cladding are supplied with a 10 year guarantee, subject to terms and conditions. Cladco Wall Caldding Boards should be installed as per this Installation Guide, and failure to do so may invalidate the guarantee.
For further information, see www.cladcodecking.co.uk/cladco- profiles-limited-conditions-sale
Tools and Equipment


Protective Equipment
When handling or carrying Cladding Boards it is advised to wear long sleeves and gloves. When cutting the Boards, we suggest wearing a protective dust mask, ear defenders and safety glasses.

Tool Set
Standard everyday carpentry tools will be needed to complete the installation, including a tape measure, pencil, spacing tools and stanley knife.

Spirit Level And String
A spirit level is essential when installing your Battens to ensure a level support system.


Power Drill Or Driver
Standard power drills can be used when installing Composite Wall Cladding Boards.


Jigsaw Or Handsaw
Composite Wall Cladding Boards can be cut using any standard wood cutting tools. We recommend using a fine-toothed blade to get the cleanest finish to your cut edge.
Preparing a Gable End
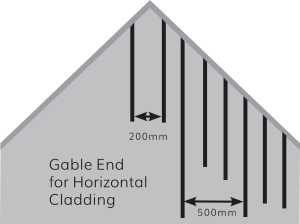

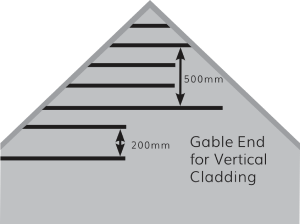

If your home has a gable end, Battens must be spaced up to 500mm apart with additional, shorter supporting Battens installed every 200mm, going up and down the apex (the triangular shape of your gable end). This ensures that the Composite Boards are fully supported across the entire build.
Ensure all Battens are level using either a tape measure or a spirit level before installing Boards. When installing 30mm x 50mm Composite Battens flush to the wall, be sure to leave an adequate ventilation gap between the wall and the Composite Cladding Boards to allow air to flow. Check your wall is stable and secure before pre-drilling 6mm holes.

DOORS AND FIXTURES
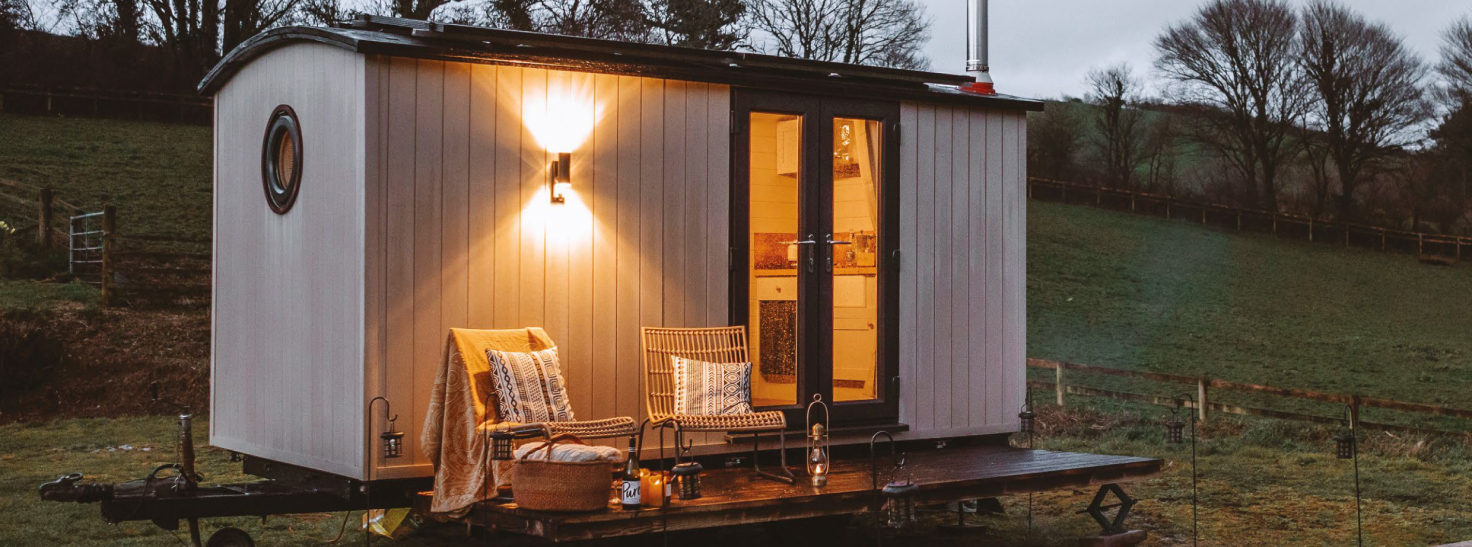
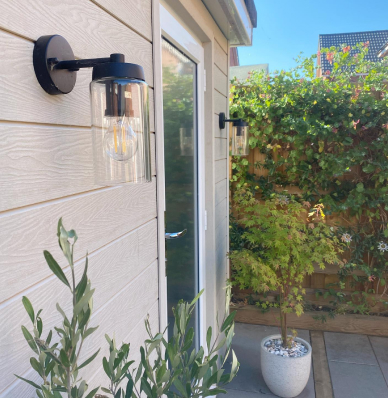
As a flexible Composite Cladding Board, wall fixings such as exterior lights can be worked into the exterior just as easy as using timber cladding.
Composite Wall Cladding and Composite Corner Trims can be worked around wall fixings, doors and windows easily using normal woodworking tools. This allows for additional features, such as exterior garden lights, to be added into your design for a professional finish.

Installation - Horizontal

1
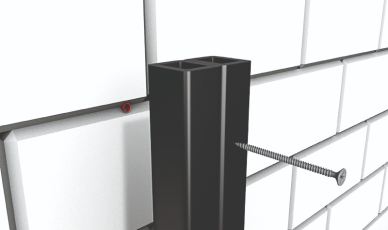
You will need to pre-drill the Battens and the surface below using a 6mm drill bit. The Battens are 30mm high and you will need to secure them at least 50mm into the surface below. You will need to choose fixings suitable for the surface you are fixing into. Screws should be 5-6mm diameter and at least 80mm long (Please note: Cladco do not provide the fixings and screws for your installation)

2
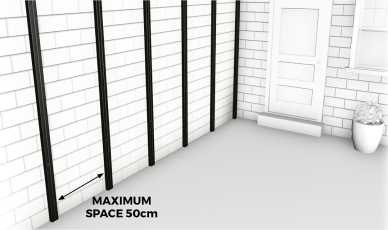
Battens should be attached to the surface at a maximum distance of 500mm apart. The Battens will need to run the entire length of the area being clad, adding in additional Battens at any point where you will need to join two Cladding Boards end to end. Remember to install your Battens at a 90-degree angle to the way that you want your Wall Cladding Boards to run. Battens should be 50mm wide x 30mm high and should be fully supported once installed. It is important that the surface below the Battens is flat and stable.

3
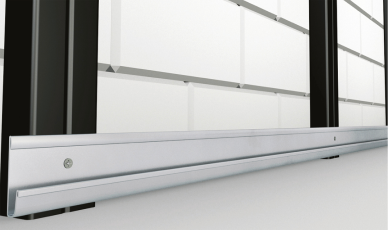
Attach a Starter Strip to the bottom of each Batten. This will give the first Cladding Board something to sit on. You will need to pre-drill a pilot hole into the Composite Batten and attach the Starter Strip using a screw that is at least 15mm long.
Ensure that each Strip is level with the next and that the first Board sits level on the Strips before continuing to the next step.

EXTREME TEMPERATURES
Extreme temperature changes could cause the Boards to expand or contract. Ensure Boards have had sufficient time to acclimatise to the temperature before installing. Do not install in extreme temperatures.

CUTTING
If Boards need to be cut to size, ensure the Boards are installed and secured immediately after cutting.

4
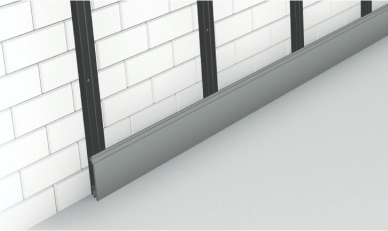
Place the first Wall Cladding Board on to the Starter Strips. Mark and then pre-drill pilot holes through the fixing groove of the Board into the Batten below.
Secure the Boards using a screw at least 20mm in length, ensuring that the Board is fastened securely on each Batten that it touches. Secure these fixings by hand, as is important not to over-tighten the screws and risk splitting the Board.

5
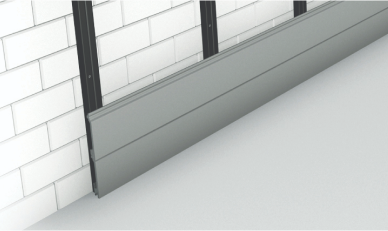
Slot the second Board onto the first and repeat the fixing process ensuring that the second Board is fitted securely in place on each Batten.
Repeat this process with each Board until you reach the required height. Ensure that the section between the Battens remains empty to allow air to flow beneath the Boards.

6
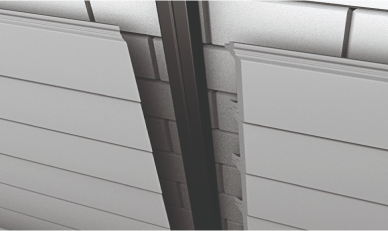
When butting two Boards together, you should use a mitered edge for a neat finish. The most common miter angle is 45 degrees.
As the cuts are angled, you’ll have one side of the wood longer than the other. You’ll need to keep track of which side will be which and make your measurements correctly.
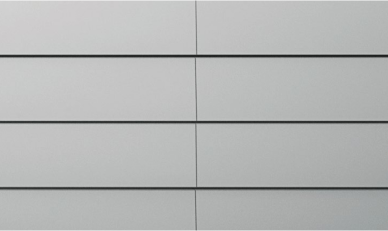

7
Set the miter saw to the angle it will need to cut. Use the included instructions for your machine, as each is different. Set the pieces side by side to ensure a neat joint. Screw the Wall Cladding through the top and into the Batten.

8
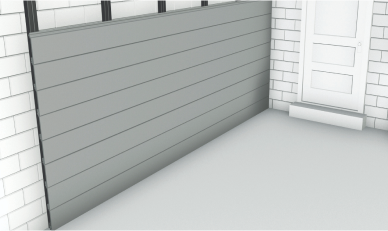
Continue to fit the Cladding Boards in this manner until you have completely covered the area you want.
It is possible to fit your Boards side by side by simply butting the two ends up together. You may need to install more Battens if you wish to do this, as each Board will need to be supported on a Batten where it meets the next Board.
WOODGRAIN EFFECT CLADDING
Did you know Cladco Composite Wall Cladding also comes in a woodgrain finish? With eight colours available, you can achieve the look of authentic woodgrain cladding to complement or contrast your space.

Installation - Vertical

1
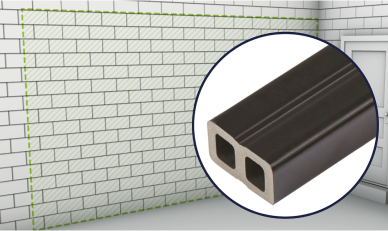
It is recommended that the Battens used to support your Cladco Wall Cladding are made from a composite material, which helps to maximise the long term performance of your Cladding.
Alternatively, you can use wooden Battens to support your Cladding following the same fitting process as you would for Composite Battens.

2
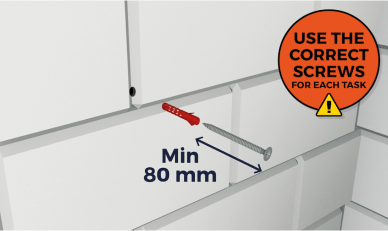
You will need to pre-drill the Battens and the surface below using a 6mm drill bit. Cladco Composite Battens are 30mm high and you will need to secure them at least 50mm into the surface below. You will need to choose fixings suitable for the surface you are fixing into. Screws should be 5-6mm diameter and at least 80mm long. (Please Note: Cladco do not provide the fixings and screws for your installation.)

3
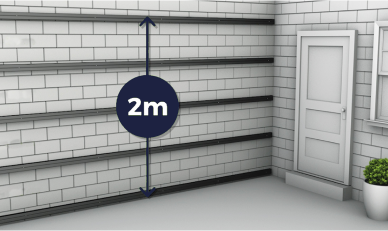
Battens should be attached to the surface at a maximum distance of 500mm apart. The Battens will need to run the entire length of the area being clad, adding in additional Battens at any point where you will need to join two Cladding Boards end to end. Remember to install your Battens at a 90 degree angle to the way that you want your Wall Cladding Boards to run. It is important that the surface below the Battens is flat and stable.

4
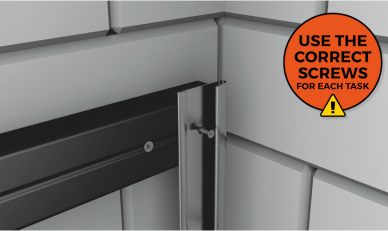
Attach a Starter Strip to the right side of each Batten, as this will give the first Cladding Board something to sit on. You may wish to pre-drill a pilot hole into the Composite Batten and attach the Starter Strip using a screw that is at least 15mm long. Ensure that each Strip is level with the next and that the first Board sits level on the Strips before continuing to the next step.

EXTREME TEMPERATURES
Extreme temperature changes could cause the Boards to expand or contract. Ensure Boards have had sufficient time to acclimatise to the temperature before installing. Do not install in extreme temperatures.

CUTTING
If Boards need to be cut to size, ensure the Boards are installed and secured immediately after cutting.

5
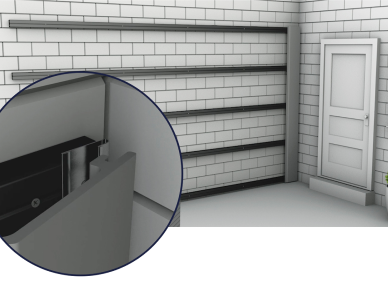
Place the first Wall Cladding Board on to the Starter Strips. Mark and then pre-drill pilot holes through the fixing groove of the Board into the Composite Batten below. Secure the Boards using a screw at least 30mm in length, ensuring that the Board is fastened securely on each Batten that it touches. Secure these fixings by hand, as it is important not to over- tighten the screws and risk splitting the Board.

6
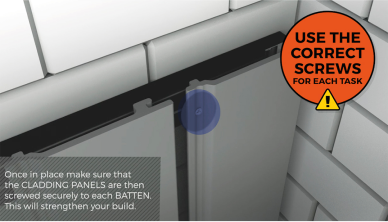
Ensure that the section between the Battens remains empty allowing air to flow beneath the Boards. Slot the second Board onto the first and repeat the fixing process ensuring that the second Board is fitted securely in place on each Batten.

7
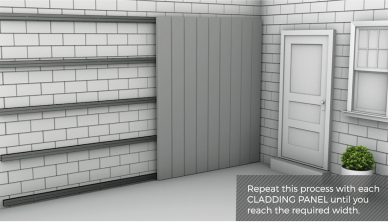
It is possible to fit your Boards side by side by simply butting the two ends up together. You may need to install more Battens if you wish to do this, as each Board will need to be supported on a Batten where it meets the next Board. Continue to fit the Cladding Boards in this manner until you have completely covered the area you want.
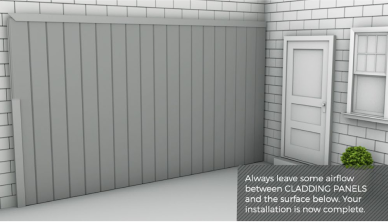

8
Depending on your installation, you may want to finish off the edges using Trims to give you a lasting professional look. There are a range of Trims available in all colours to complement your Cladding Boards, which can be secured to your installation by glue.
SHARE YOUR PROJECT
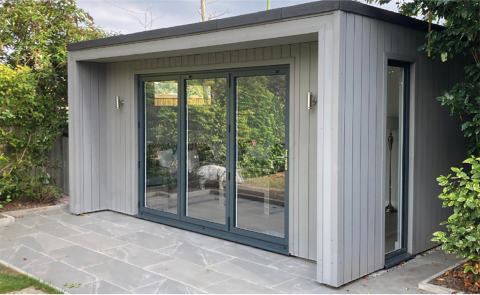
We love seeing how our customers have used Cladco Wall Cladding Boards to transform their buildings. Send us your finished project by emailing photos into [email protected], or tag us on Instagram using @CladcoProfiles.

Finishing Your Wall Cladding
AIRFLOW
Ensure your Aluminium Decking area allows for plenty of cross ventilation and airflow by including adequate spacing around the area and between walls and other solid structures.

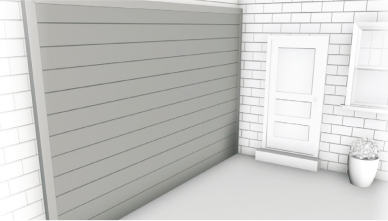

Whether you have installed Composite Wall Cladding vertically or horizontally, you can use matching Composite Corner Trims to complete the look of your project for a professional touch.
Composite Corner Trims can be worked into your installation easily using normal woodworking tools and Sumogrip Adhesive.
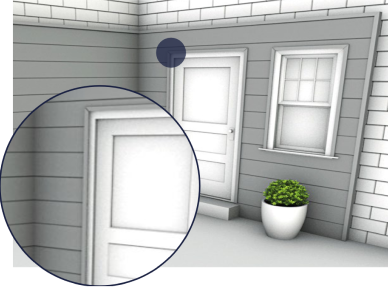

Installing Corner Trims is the last phase of the project. Install Composite Wall Cladding as above right up to any windows or doors.
Take the Corner Trim and measure the length of the area it’s going to be fitted on, for example, the width and height of a door or window. Corner Trims can be cut to length and worked just like timber. If placing two trims side by side, these can either be mitered to create a neat angle, or cut to fit.
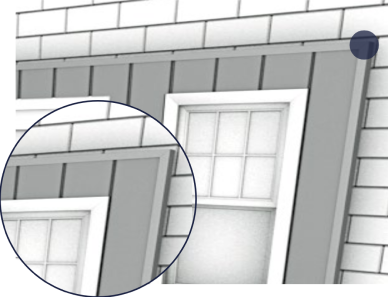

Once the Corner Trim is cut to size, you can use Sumogrip adhesive along one or both sides of the Corner Trim to attach it to the edge of the Cladding.
To allow for expansion you may wish to only glue the top edge. Once installed, you can then cut and place the second piece of Trim along the edge until you have the desired finished look.
Aftercare and Maintenance


MAINTAINING YOUR COMPOSITE CLADDING
For standard everyday maintenance, such as clearing plants and leaves, brush your Cladding Boards using a stiff bristled brush.
To remove any dirt, grime or animal droppings, for example, Composite Cladding Boards can be washed using warm, soapy water and a sponge when needed. This will ensure your Cladding will look its best for years to come.
Cladco Composite Cladding products require very little maintenance once installed. Composite Cladding is also rot and weather resistant, and unlike traditional timber materials, Composite Cladding products do not need to be painted or stained.

FAQs
Can Wall Cladding Boards be installed indoors?
Yes, Cladco Composite Wall Cladding is a versatile Cladding material, designed to transform the exterior of your home. However, the Boards can easily be installed indoors, if desired.
Can I use a pressure washer?
A pressure washer can be used to clean your Composite Cladding Boards. We recommend using a pressure washer with a psi of no greater than 2,000.
A fan tip should be used with a 40 to 60 degree spread, keeping the head 250-300mm away from the surface. Always test in an inconspicuous area first. Direct, prolonged contact could damage the surface of the Boards and should be avoided.
Do I need planning permission to put my Wall Cladding up?
In most cases, adding Cladding to your home does not require planning permission, providing that the materials are of a similar appearance to the rest of your home. In some cases, you may need to apply for planning permission if your home is a listed building in an area of exceptional beauty or a national park. Please note that we are not licensed planning or building surveyors. We recommend speaking to a licenced professional.
Do I need to paint my Composite Wall Cladding Boards?
Cladco Composite Wall Cladding Boards are available in a variety of eight colours. The lowmaintenance composite material does not need to be sanded, treated or painted. Simply select your chosen colour, install and enjoy. Please note, Cladco Composite Decking Boards cannot be painted.
How much do Composite Cladding products weigh?
Cladco Composite Wall Cladding Boards are available in 3.6m lengths. Each 3.6m length can cover 0.45sqm. Each Board weighs approximately 6.95kg.
What colours are available?
Composite Cladding is available in eight colours to match your chosen design or to blend into the environment. Composite Corner Trims are also available in the same eight colours.
What colours are available?
Composite Cladding is available in eight colours to match your chosen design or to blend into the environment. Composite Corner Trims are also available in the same eight colours.
Do Composite Cladding Boards fade?
Like any Composite material, Cladding Boards will undergo a stabilisation process, during which a slight fading will occur as they reach their final colour. This process generally takes place within the first six months following installation, particularly evident in woodgrain designs, where variations in shading may result from the sanding process
Are darker colours better than lighter ones?
In general, lighter colours such as Ivory will show dirt and marks more clearly. Darker colours, however, will naturally weather over time to their final colour within six months of installation.
What is Composite Cladding made of?
Cladco Composite Wall Cladding products are manufactured from 60% recycled hardwood fibres and 40% recycled plastic. This makes them an environmentally-friendly, rot resistant and durable Cladding material.
Is Composite Cladding fire rated?
As Cladco Composite products are part wood fibres, Composite Wall Cladding Boards are not fire rated.
Is Composite Cladding maintenance-free?
Composite Cladding needs much less upkeep compared to traditional timber materials, however, it is not completely maintenance-free. Routine cleaning is essential to get rid of debris and stop potential staining. If your Cladding is located beneath overhanging trees, it is important to promptly clear leaves, petals, and sap to avoid surface marks. Additionally, water runoff from gutters and downpipes may stain the Boards, making regular maintenance vital to preserve their appearance.
Why are watermarks appearing on my Composite Cladding?
Watermarks may occur as a result of the weathering process associated with Composite materials. As the tannins from the timber content of the Boards come to the surface, these marks can become visible. This condition is temporary, and the marks will naturally fade as the Cladding stabilises.
Do Composite Boards fade?
Like any Composite material, our Cladding Boards go through a process of stabilisation where fading may happen until the final colour is reached. Stabilisation usually occurs during the first six months following installation. This is more evident in the woodgrain design, where shading variations can arise due to the process of sanding.
Are Composite Boards susceptible to scratching?
Composite Cladding Boards can be prone to scratching, especially if met with harsh materials such as metal. To prevent scratching, avoid contact with tools that could cause damage.
Do some colours need more maintenance than others?
Some of our lighter Cladding colours, such as Ivory, can show dirt more easily, so you will likely need to clean them more often than our darker colours.
Why is spacing at the ends of the Boards required?
Ventilation behind your Cladding Boards is crucial for the evaporation of excess water. Allowing space at the ends of the Boards, around the perimeter of your installation, provides an exit for air and improves moisture control.
Can This Be Used on Domestic Properties?
Cladco composite cladding is an appropriate choice for exterior applications on domestic properties. However, it is the responsibility of the customer to ensure that the product complies with relevant building standards and regulations. Cladco shall not assume any liability should the products fail to meet specific building, fire, structural, or other legal requirements pertinent to your intended use or installation.
Why is mould appearing on my Cladding?
Mould or mildew may develop due to airborne spores. Ensure proper airflow behind the Cladding and maintain adequate spacing during installation. Regular checks and cleaning will keep your Cladding in excellent condition


