Nordeck Decking
Installation Guide, Aftercare and FAQS

Storage, Handling and Health & Safety


Storage and Handling
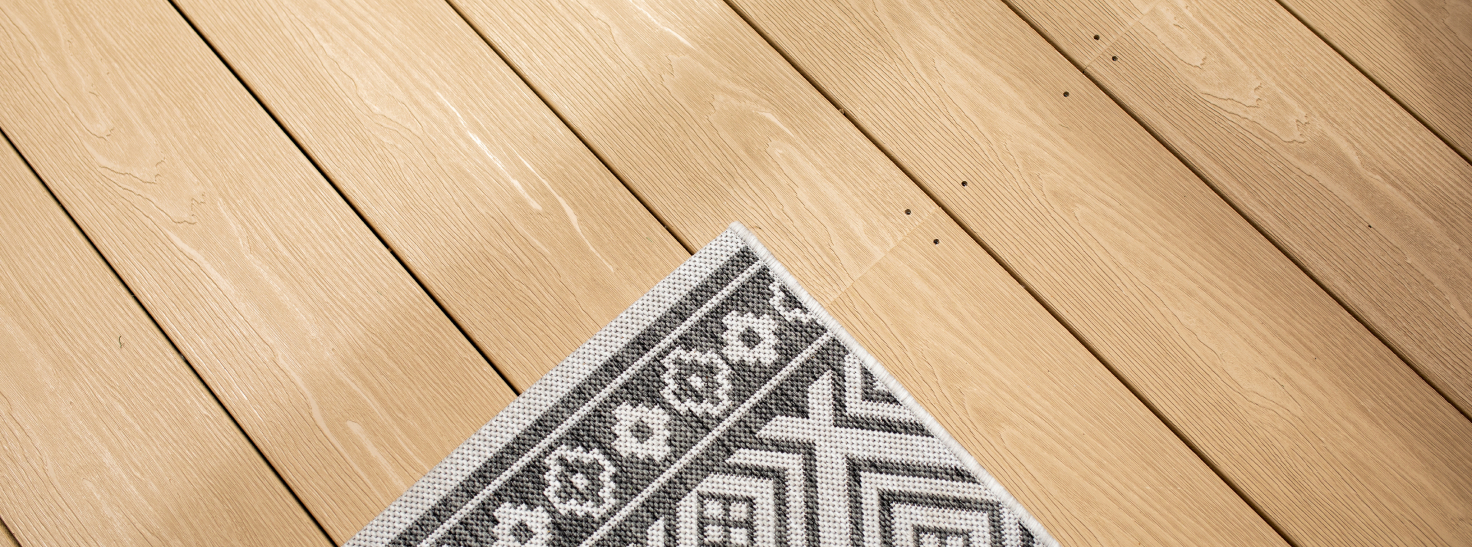
Cladco Nordeck Decking Boards should always be stored in a cool shaded spot, on a flat and level surface which supports the whole length of the Board. It is recommended to store the Boards on a pallet to ensure they are not sat directly on wet or cold ground.
Wear protective gloves when handling the Boards and take care when lifting them. We recommend that a minimum of two physically capable persons carry the Boards. Always ensure any persons assisting with installation or handling are physically capable.


COLOUR
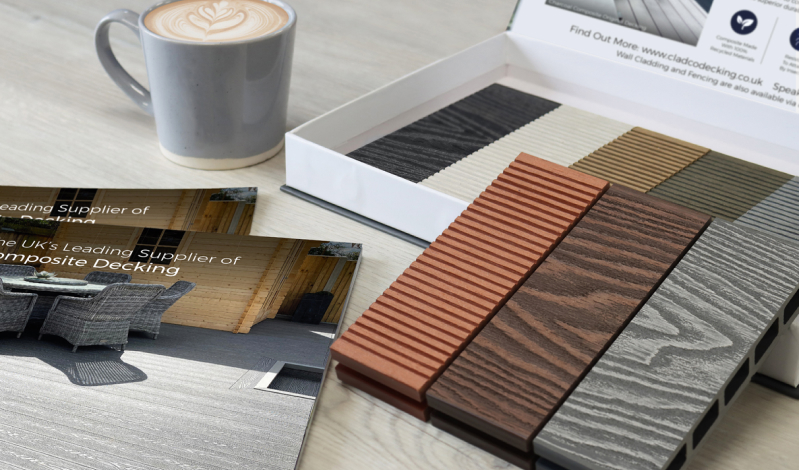
Cladco Nordeck Decking Boards are designed and manufactured to replicate the natural variants of a timber decking board.
It’s recommended to purchase all Boards required for the project at the same time, this will ensure colour consistency and ensure only one delivery cost. We recommend laying out all the Boards before installation to ensure a natural effect of grain and colour tone is balanced across the whole of your Decking. As with all materials exposed to direct sunlight and weathers, some natural weathering may occur over time.


20 YEAR GUARANTEE
Cladco Nordeck Woodgrain Effect Decking Boards are supplied with a 20 year guarantee subject to terms and conditions. Cladco Decking Boards should be installed as per this installation guide, failure to do so may invalidate the guarantee.
For further information, see www.cladco.co.uk/cladco-profiles-limited-conditions-sale
Tools and Equipment


Protective Equipment
When handling or carrying Decking Boards it is advised to wear long sleeves and gloves. When cutting the Boards we suggest you wear a protective dust mask, ear defenders and safety glasses. Knee pads are recommended to be worn when fitting Decking.

Tool Set
Standard everyday carpentry tools will be needed to complete the installation, including: tape measure, pencil, spacing tools, stanley knife and plug cutters


Power Drill AND Driver
Standard power drills can be used when installing Nordeck Decking Boards. A standard Phillips screwdriver bit PH2 x 50mm should be used when working with Speeddekz 65mm Woodscrews and Speeddekz 50mm Screws.


Sumogrip Adhesive
We recommend using CT1 or Sumogrip adhesive to secure the Fascia Boards when used to conceal a support system beneath. When using adhesive, do not allow the adhesive to get on the Decking Boards, as this can damage the finish of the deck.


Jigsaw / Handsaw
Decking Boards can be cut using any standard wood cutting tools. We recommend using a fine-toothed blade to get the cleanest finish to your cut edge.

Spirit Level And String
A spirit level is essential when installing your Decking to ensure a level support system. A spirit level ensures the Decking Boards are installed along a straight edge. A slight slope should be included to allow for water run-off.
Prepare Your Base
Choose From Two Bases
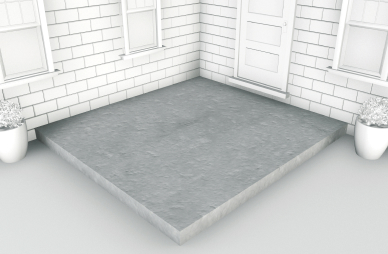

Concrete Base
A 100mm thick concrete base is recommended, with a slight slope for drainage to occur. The optimum slope should be around 5mm for every metre.
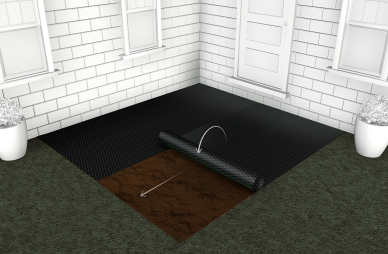

GRASS OR SOIL BASE
Remove the turf or soil until the ground is completely even, ensuring to remove any debris or rocks from the area. Cover the area of your site with a layer of Weed Mat to prevent any weed re-growth coming up under your Decking.
If you need to overlap the Weed Mat, ensure you do this with enough fabric to prevent any gaps. Once cut and pinned into place, cover the Weed Mat with your desired coverage, such as chippings, bark or stones, so that none of the Weed Mat material is exposed.
AIRFLOW
Ensure your substructure design allows for significant airflow and ventilation. If the Decking is being installed on areas with poor ventilation, the Decking substructure must be installed on top of Joists which allow for a 47mm airflow gap.

Timber Framework
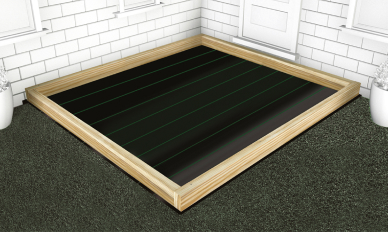

1
Prepare a level, weed-free area for the deck. To create a framework, cut the joists (using either a 47mm x 100mm or 47mm x 150mm) to the required length, then join using exterior wood screws. Check the frame is square, by measuring diagonally from corner to corner.
If installing on grass or soil, use a weed mat to ensure weeds do not grow through from the base of the Decking frame.
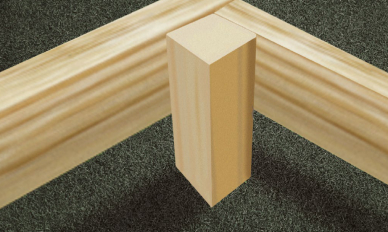

2
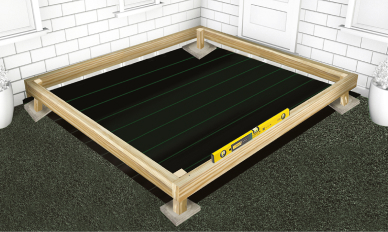
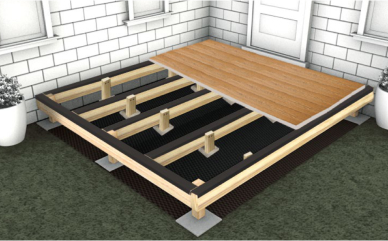
To raise the frame, cut four blocks of 100 x 100 treated timber, to the desired height. Screw these to the inside of the frame, at each corner, ensuring they are flush with the top. These legs will be taking all the weight for now, so ensure they are properly supported using blocks and secured to the frame.

3
If your deck will be sitting on grass or soil, you will need to place blocks or slabs underneath each leg, to spread the load and provide a level, stable base. Additional blocks can be used if required. Position and adjust the blocks/slabs, ensuring the frame is at a slight angle, that will allow the water to drain down the length. We recommend a slope of at least 5mm for every metre. Alternatively, if using slabs, you could dig a hole and set the legs in concrete.

4
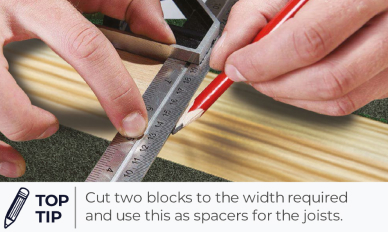
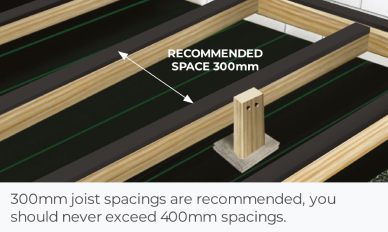
Mark across one side of the frame every 300mm, this will set your joists at the recommended required 300mm centres, then repeat the process on the opposite side of the frame. You may wish to set your joists at smaller than 300mm centres, to ensure even spacing of the joists across the frame. Remember you will need to have a double joist in areas, where the ends of two Boards meet.

5
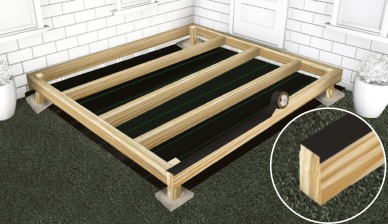
Measure across the inside of the frame at your joist marks, then cut lengths of (47mm x 100mm) or 47mm x 150mm) timber to suit. To fix the joists, tap them in with a hammer until flush with the top, ensuring they do not push the frame out of shape. Then screw them in place from the outside of the frame. Apply Deck Tape to the top surface and cut ends of joists to protect them from moisture.

6
Support the joists with additional 100mmm x 100mm legs, spaced at 1m maximum intervals. Follow the same method as shown in steps 2 and 3 for these legs, ensuring each is supported by a suitable block, slab or concreted into the surface below. Use additional supporting legs for the outer frame ensuring the whole area is supported.
HAVE YOU THOUGHT ABOUT TRYING A DIAGONAL PATTERN?
Why not transform your space by installing in a diagonal pattern. This pattern is great for walkways or for the more compact decking areas, as it can elongate the space.
Simply lay the Boards at a 45-degree angle to the Joists, or build the Joists to a 45-degree angle within the frame. When using a diagonal design, the Joists must be no more than 250mm apart.
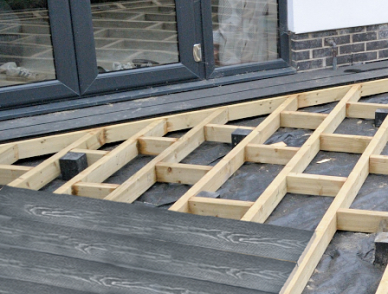

Laying The Decking Boards

EXTREME TEMPERATURES
Extreme temperature changes could cause the Boards to expand or contract. Ensure Boards have had sufficient time to acclimatise to the temperature before installing. Do not install in extreme temperatures.

CUTTING
If Boards need to be cut to size, ensure the Boards are installed and secured immediately after cutting.

7
Start by laying out your Decking Boards onto the desired area before fixing them in place. Ensure there is a 3mm gap between any Boards at butt ends or side by side and between all walls and fences.
Check all Boards fit, and you are happy with the layout. Cut Boards must always be positioned over and fastened to a supporting joist. Each Board will cover an area of 0.72m2.

8
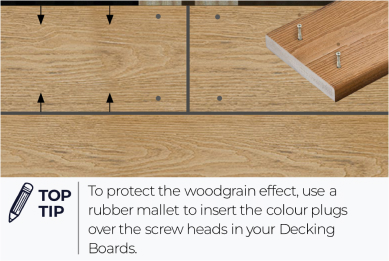
Secure one end of the Board into the structural base below using Cladco Hidden Deck Fasteners with the supplied drill bit and Plugs. Screws should be inserted 13mm away from the edges of the Board. Apply pressure using the supplied drill bit to compress the orange pad onto the surface of the Board to create space for the Plug. The supplied Plug can then be inserted to create a flush, hidden finish over the Screw head to conceal it.

PAINTING THE END OF THE BOARDS
You may wish to paint the end of the Decking Boards to hide the grey core interior. We recommend using exterior grade acrylic water based paint.
A row of 65mm Screws with Plugs should be fixed down the entire width of both sides of the Board at regular intervals over Joists, positioned 13mm from the outside edges.
Alternatively, Nordeck Decking Boards can be secured to Joists using Cladco 65mm SPEEDDEKZ Decking Screws. Please note that using this type of screw will show the head.
Around 26 Screws should be used per 3.6m Board. After installing each Board ensure they are lined up correctly until the deck is complete.
Finishing Your Decking
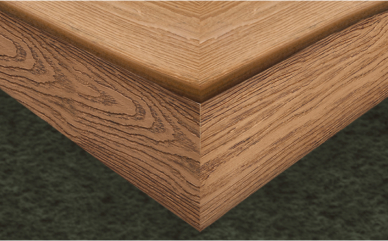

Bullnose & Fascia Boards
Made with the same premium material as the Decking Boards, Bullnose and Fascia Boards can be used to finish your project to a high standard.
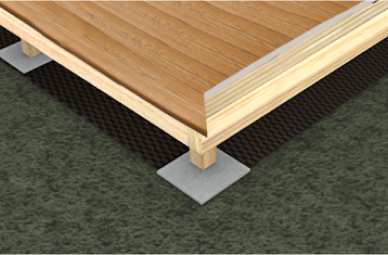

HOW TO INSTALL BULLNOSE BOARDS
Cladco Hidden Deck Fasteners consisting of 65mm Screws, a drill bit and colour Plugs, can be used to secure Nordeck Bullnose Boards to Joists. Ensure Screws are fixed along the entire length of the Board, with a Screw inserted into each Joist. Apply pressure using the supplied drill bit to compress the orange pad onto the surface of the Board to create space for the Plug. The supplied Plug can then be inserted using a rubber mallet to create a flush, hidden finish over the head.
Two rows of Screws are recommended for each Board, inserted 13mm from the edges. We recommend using 26 Screws per 3.6m Board.
Alternatively, 65mm SPEEDDEKZ Deck Screws can be used through the Boards. Please note that the head of this type of Screw will be visible.

FASCIA BOARDS
Once the Bullnose Boards have been installed, you may wish to add the matching Fascia Boards to the Decking installation.
Fascia Boards can be fitted to the exposed structural joists, hiding the base below and the underside of the deck.

CT1 ADHESIVE
When using adhesive, do not allow the adhesive to get on the Decking Boards, as this can damage the finish of the deck.
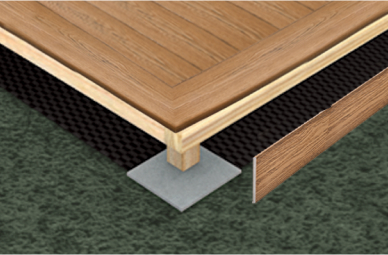

HOW TO INSTALL FASCIA BOARDS
Using 50mm SPEEDDEKZ Deck Screws, fix the ends of your Fascia Boards to the Joists behind.
Ensure the Screws are inserted 13mm from the edge of the Board. Continue fixings 300mm, after the first Screw. Alternatively, you can use a strong adhesive (such as CT1) to secure the Boards. For optimum results, alternate between Screws and adhesive every 150mm until the Board is fastened securely.
Aftercare and Maintenance


SNOW AND ICE
Take care when walking over your Nordeck Decking in adverse weather conditions, such as snow or ice, as the Decking may become slippery.
If using de-icer, ensure that the product contains calcium chloride, as this will not damage the Decking. This may leave a slight residue behind, but this can be easily cleaned away. Always check before using any chemicals on the Decking.
Do not use grit, sand or metal/plastic spades on your Decking as they may scratch the surface.


MAINTAINING YOUR NORDECK DECK
Cladco Nordeck Woodgrain Effect Decking has a 20-year guarantee and is stain, scratch and fade resistant. In some cases, pressure washing may be required for long term dirt.
For standard everyday debris such as, plants, leaves, berries, animal droppings etc. Simply brush your deck free of any debris.
Discolouration can be caused by chemicals found in everyday household products, such as suntan lotion, or insect repellent, take care when using these products near your Nordeck Deck.
FAQs
Where can I install my Decking?
Cladco Decking is very practical for any outdoor space (subject to building control and a structural framework). Cladco Nordeck Decking can be installed on grass, soil or concrete providing a suitable frame has been created on top.
Can I use a pressure washer?
A pressure washer can be used to clean your Decking area. We recommend using a pressure washer with a psi of no greater than 2000.
A fan tip should be used with a 40 to 60 degree spread, keeping the head 250-300mm away from the surface. Please note that using pressure washers may increase the chance of screw holes becoming more visible. Always test in an inconspicuous area first. Direct, prolonged contact could damage the surface of the Boards and should be avoided.
Will my Decking get hot in the sun?
As with all products exposed to the sun, they can become hot over prolonged periods. Darker colours can feel hotter in areas exposed to direct sunlight, footwear may be necessary in these circumstances. Special caution should be taken when using Decking in areas with prolonged sun exposure and next to glass.
Can I use a fire/bowl or patio heater on my deck?
When using a fire pit or patio heater, it is always recommended to test this with an offcut of Board first. Any embers or heat that come into contact with the Boards should be removed immediately Embers or heat may damage the integrity of the Board and cause marks to the surface.
Can I use a standard Board as an edging piece?
Yes, but only where the edge is merely aesthetic, such as a balcony edge, if this is your preferred finishing option. However, where the edge is likely to sustain impact, such as a step, we do not recommend using a standard Board. Nordeck Bullnose edging Boards have been specifically designed with high impact in mind and as such have a thicker surface to withstand the knocks and scrapes associated with step edges and other applications.
How much does Nordeck Decking weigh?
A single 3.6m Nordeck Decking Board weighs approximately 18.20kg.
What colours are available?
Nordeck Decking is a high-quality, premium choice for any decking project. Unlike traditional timber decking, Nordeck Decking Boards are available in a range of six colours, designed to match or contrast existing buildings and architecture.


